Review
How to install
Chocapic13’s Shaders 1.21 → 1.20, the pack that revolutionized the Minecraft community. Do you want to improve your Minecraft graphics but don’t know how? Are you aware that very few Shaders can offer the best features like Chocapic13’s Shaders? The truth is that Minecraft default look and graphics is far below average. Unless you are a newbie, it isn’t easy to experience what the game has got to offer. This is why an upgrade in terms of graphics is required through a proven Shader like Chocapic13’s. Many shaders have indeed been developed in the game to help players get an immersive gaming experience. However, very few have lived up to expectations. There is no need to bother finding a reliable Shader pack as Chocapic13’s Shaders can meet your needs. Don’t believe what this famous and influential Shader pack can contribute to your overall gameplay? Ensure to read this post from start to finish. It will be explaining everything about Chocapic13’s Shaders.
Chocapic13’s Shaders was created in Feb 2014. The brain behind its development is Choca_13, a brilliant developer who has managed to create some meaningful projects in the past for the Minecraft community. It may interest you to know that ever since its release, players have had it downloaded and installed more than a 7.6 million times. This is because it has been created to do one task that players have been complaining about – upgrading the game’s graphics most dramatically. So, in case you have never known what it means to improve the graphics of Minecraft, try to download and install this shader pack. It has the potentials to transform your world from nothing into something quite impressive. One of the reasons why Chocapic13’s Shaders has been considered unique in lots of regards is that apart from being lightweight, it can still improve the world of players. Even the lowest level of customization while using this mod can bring about a decent quality. This means that even if your PC is low on specifications and graphic processor power, this mod can still make things happen. That is to say; it can still turn your world into something stunning. The best part is that its high end preset is between 80 and 100 fps. So in case you have been searching for a shader pack that tends to offer high-end visuals, this one ticks all the boxes in such regard. When you want to talk about a shader pack that sets the standard and raised the bar, Chocapic13’s Shaders has succeeded in achieving such a feat. One of the reasons for its massive popularity amongst Minecraft players is how easy it can be to use for best results. Again, it can be said that Choca_13 has put in lots of efforts to make it successful amongst other shader packs.
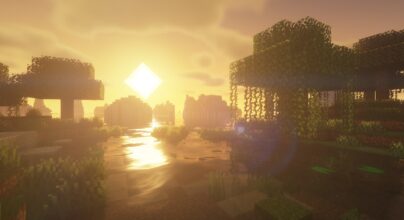
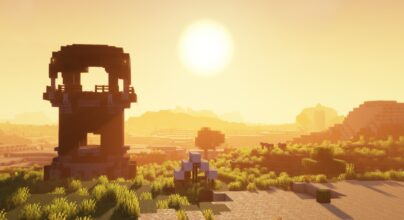
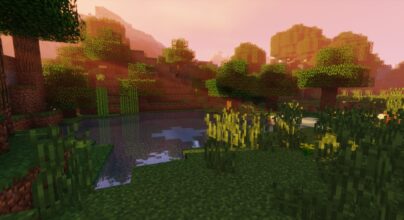
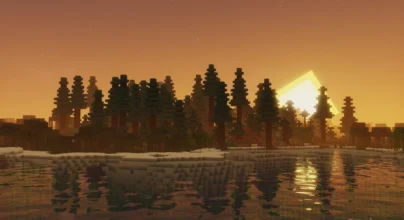
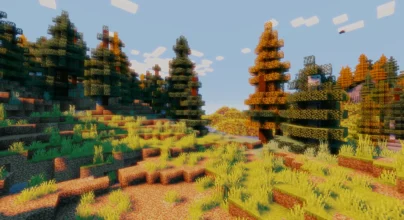
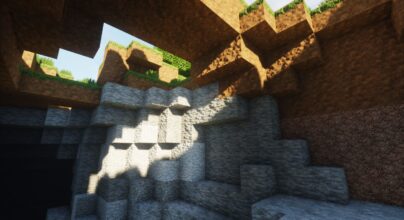
Chocapic13’s Shaders comes with lots of premium features and additions that will make your world real. For instance, the graphics have undergone lots of overhauls. This is evident in the way water, sunshine and leaves will appear in your world.
Gallery
How to Install?
The installation guide has been relocated to the installation tab located at the top of the page.
Quick pollHelp Developers
Chocapic13’s Shader Links
Please note the following information:
- Some shaders have not been updated for version 1.21.4 of Minecraft. However, all shaders have been tested and are confirmed to work correctly in Minecraft 1.21.4.
- All download links are original and sourced from the creator. We do not host or modify any files. Our role is solely to provide direct links to our users, ensuring security and quality.
- Additionally, you can explore the list of the best Minecraft shaders of all time.
We have compiled helpful installation guides to ensure correct installation of this shaderpack in your Minecraft. Follow these guides for a seamless installation experience.
Backup Guide
It is strongly advised to create a backup of your Minecraft map before updating the game to new versions to ensure the safety of your progress.
Locate the Folder
Locate your Minecraft installation folder. The default location for the Minecraft folder varies depending on your operating system:
- Windows: %appdata%.minecraft
- Mac: ~/Library/Application Support/minecraft
- Linux: ~/.minecraft
Make a Copy
Once you’ve found the Minecraft folder, make a copy of it and paste it into a different location, such as an external drive or a backup folder on your computer.
Save and Restore if Necessary
The copied Minecraft folder will serve as your backup. If anything goes wrong during the mod installation process or if you want to revert to the original state, you can replace the modified Minecraft folder with the backup.
Java Installation Guide
Optifine and Forge require Java to be installed on your computer in order to work properly with Minecraft.
Download the Java installer
Visit the official Java website here: On the website, click on the “Download Java” button.
Run the installer
Once the installer is downloaded, locate the file and double-click on it to run it.
OptiFine Loader
Required 1.8.8+Step by Step
Download Optifine:
Download the appropriate version for your Minecraft.
Install Optifine
Once the Optifine file is downloaded, run the installer and follow the on-screen instructions to install it

Download Shaders:
Download the Shader package that is compatible with your Minecraft version.
Launch Minecraft with OptiFine
Open the Minecraft launcher and select the newly installed OptiFine profile to launch the game.

Locate the Shaders option
Once in the game, navigate to the “Options” menu, then select “Video Settings,” and click on “Shaders.”

Install Shaders
In the Shaders menu, you’ll find a “shaderpacks” folder button. Copy the downloaded shader pack’s zip file into this folder.

Enable the shader in Minecraft
You should see the installed shader pack listed in the in-game Shaders menu. Select it to enable the shader.


