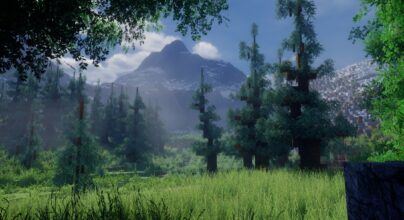
There are numerous advantages of installing the Optifine 1.21 in the Minecraft game to optimize its performance. The features involved in its application range from implementing AdvancedOpenGL for fasting, turning off light lighting, fog, animations, clouds, stars, and sky. How to install Optifine is easy. Just follow us to set up graphics for fasting to determine the short-circuit/little distance and extreme FPS (number of frames per second) operation.
If you want to bring modern graphics settings, through which you can adjust, disable Minecraft’s sensory abilities. Come one, free yourself from crashes and increase the volume of FPS. Optifine Minecraft is the solution to improve the experience in the game, especially the graphical representation that encompasses even super-advanced computers.
Ways to Install Optifine on Minecraft?
Installing Optifine 1.21 in Minecraft will considerably increase the graphics of the game, making it look much better. However, this type of mod, which also adds different video alternatives (dynamic light) to Minecraft controls, cannot be installed on mobile devices or consoles, only on computers. It can be installed through Minecraft Forge or without it.
Simplified Installation:
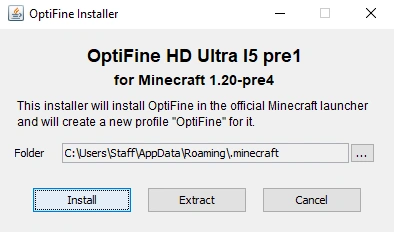
- Update your Minecraft to 1.21.
- Download Optifine.
- Run the Optifine installer and press “Install“
- Open Minecraft Launcher, choose Optifine profile and press Play
For those who get the “install pre1” error:
Go to Installations, enable the Snapshots button (a little checkbox in the top right).Go to New installation -> Version -> scroll down a little until you see “snapshot 1.18pre-1.”Load up the game on that version. Then close it out and install Optifine from there.
Illustrative installation of Optifine:
How to install Optifine is a piece of cake; follow these steps:
To start it is necessary to have Java, the tool needed to install Optifine.
- Go to the Java download page. After downloading, install it, you can check our tutorial on how to install Java. Confirming the browser that there are no problems with this file.
- It is necessary to update your Minecraft so that the version you want to install the Optifine before installing it.
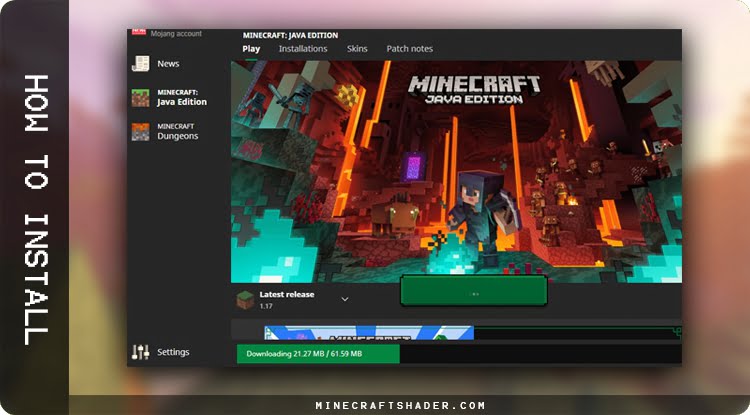
- Go to the Optifine download page. So, you must locate the most recent version of the Optifine to download. This version must match your Minecraft. After viewing it, the next step is to download by ignoring high-risk messaging ads.
- After installing Java; You can proceed with the installation of the Optifine. Click the JAR file that you downloaded (Optifine installer), click “OK,” and the installation will be performed automatically in Minecraft without the need for configuration.

- Next, you will access the game through the profile created by Optifine, a tab located at the bottom of the screen linked to the installation, and select the Play button.

You will immediately see an alert message that you can ignore because it is not a file that implies any damage.
You can enjoy all the advantages of installing Optifine in Minecraft, including installing different Shaderspack and textures that will optimize the game and, therefore, its performance.
How to Install Optifine with Forge Mods? Windows & MacOS
To install the Optifine mod to play with mods on your Mac or Windows computer, you need to download the Minecraft Forge file.
- Access the official link https://files.minecraftforge.net/.
- You will see a screen with several versions; download the version that corresponds to your Minecraft version. Then, you just need to click “Installer.” Although it is common for you to view a warning because it is a JAR file, press the “Keep” button located in the lower-left corner of the screen (on Google Chrome).

- Open the Forge installer, press OK, and the installation process will start immediately.

- Open Minecraft Launcher and choose the installed version of Forge to run it.

- If you prefer to install Optifine using Minecraft Forge, you must install Forge first. After completing these steps now, you should know the address of the folder where Minecraft is installed.
- In Windows Open the “RUN” or ⊞ Windows + R “%Appdata%/.Minecraft”
- In MacOS Open Finder “~/Library/Application Support/Minecraft”
Continuing: How to install Optifine with Forge:
- Copy the downloaded Optifine file.
- Still in the directory of the Minecraft folder, you must search for the “mods” folder in both Windows or Mac.
- Enter the mods folder, located between the other folders. If the mods folder does not exist, you can create one as follows:
- Windows: Use the shortcut command CTRL+SHIFT+N. This way, a new folder will be created on the computer. Type the word “mods” in tiny and click “Enter.”
- Mac: Click Right of the mouse any space inside the folder, then “File” and then “New Folder,” type the word “mods” and click “Enter.”

- Inside the MODS folder, paste the Optifine file. You must press it for Windows Ctrl + V or Mac Command + V.

- Open Minecraft, run it from the forge profile if you want to run optifine through the Forge. Make sure the forge profile is selected and press “Play.”

Quick Tip: The Popup Will Appear Saying That The Version You Are Going To Play Does Not Support The Latest Security Features for The Player. This is the Standard Message. You Can Approve It.
How to use Optifine?
You can start Minecraft as soon as the Optifine is installed. Click on it in the lower-left corner of the Minecraft window. You can expand the Menu tab or create a new profile. You also can develop new profiles for the different versions of Optifine you want to know. Too easy! After clicking on the profile, you get to use Minecraft.
Navigate to the “Options” button, and then click “Video Settings.” Here you will see options that did not exist before. You will enjoy the change as soon as you start searching for the new settings. For example, if you want to know which version of the Optifine is using, press the F3 option of the keyboard to see the full version on the screen.

Suppose the option Shaders do not stand accessible in the “Video Settings” menu. In that case, you installed an unstable version of the Optifine that is still not fully compatible with shaders.
Optifine Add Minecraft Compatibility with Shaders, so see our tutorial on how to install Shaders.
You can enter as a single-player or multiplayer because it has the advantage of not being a real mod, and you can play on official servers since it only changes the graphics of the game.
In summary, after the Optifine installation, you will have access to several new functions that help a lot to have more performance in Minecraft. Graphic improvements are also notable. The installation of resource packs becomes optimized, giving better details to the textures. The installation of Minecraft Shaders will also provide the greatest reality to the game. It’s time to have fun. Enjoy every characteristic that Optifine adds to Minecraft. Good game.
OptiFine FAQ
To change the design of your OptiFine cape:
Download and install the latest OptiFine
Launch Minecraft with OptiFine
Go to Options -> Skin Customization -> OptiFine Cover -> Open Cover Editor
You will automatically be redirected to the cover editor page.
It costs 10$ at the moment.
The default key for zooming using Optifine is CTRL.
OptiFine comes with many optimizations that should increase FPS without any configuration. You can further increase the FPS by configuring your Video Settings and finding the tradeoff between quality and performance that works best for you. When hovering over each option, a popup will be displayed showing which one is best for performance.
Optifine has three different editions, Ultra, Standard, and Light. Each one with its characteristics is:
OptiFine Ultra has most of the optimizations and features that can increase FPS. As a result, it’s the most popular and recommended edition.
OptiFine Standard is more compatible with other mods.
OptiFine Light may be more beneficial for low-power laptops and notebooks. Still, it lacks advanced features and is not compatible with Minecraft Forge.

