Bliss Shaders 26.1.2 → 1.21.11
Best
Enhance your Minecraft gaming experience with Bliss Shaders. Discover its mind-blowing features and improved performance.
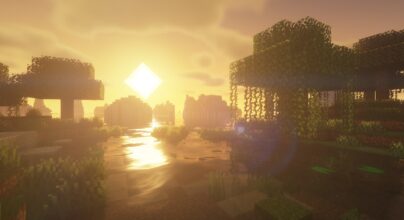
Bliss Shaders 26.1 → 1.21.11 is another excellent Minecraft shader that gives a better appearance in the game and increases performance. If you want many features for your shader, then bliss is one of the best choices. If you are an old player of Minecraft, you may know about the Chocapic13 shader edit that is mindblowing. Bliss Shader is also an example from the chocapic13 shader and has become a masterpiece for gamers. There were few expectations from the Bliss at the time of its launch, but with time it will become the most popular Minecraft shader. The name of the Minecraft Bliss Shader is accurate and fully complements its Bliss ful features. It has immense gaming features and making it top-rated among professional gamers. The creator of Bliss shader shares the experience and reason behind its launch: it fits their taste and is easy to download even on low-quality systems. The key feature of the Bliss shader is to bring a dynamic change in everyday objects like skys. It will look more pretty and perfect, especially if you want to capture a timelapse while playing the game. You can capture the village and dynamic trees during the game and enhance their realistic views through editing.
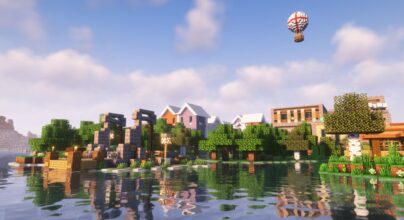
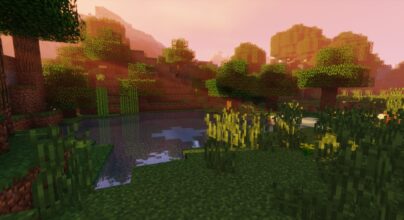
Moreover, the cloud shadows will look more realistic and give the niche sight in the game. It brings the biome-specific environment in a game where all the colors in every object are accurate and gets the right amount of depth, like in fog and clouds. It is like the typical shader with the bloom, screen space, and reflection effects through normal shading. But the labPBR support gives the emission and scattering features to bring the porosity into the game. Through its customizable features, you can control the sunlight, fog shapes, colors, ambient light, and cloud density. Moreover, the shader edits are amazing things in the Bliss shader of Minecraft. It can make astounding edits that are also available in the game. There are different ways to edit the shader and create possibilities endless for enhancing your gaming performance. You can change the entire way to look in the shader and its functionality for adding new features. It has endless possibilities for making your shader and brings versatility to the game. The developers will give you a chance to take your try and enjoy the game.
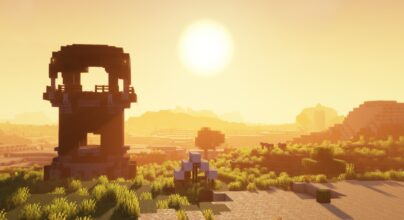
You Can enjoy the shader through Iris and Optifine support for enhancing the game features. The best thing about the Bliss header is the well-made features that are lightweight and increase the game performance. There are a lot of customization features in the game that brings better performance and aesthetics in the game. It is the best shader for every gaming device, including the PC and mobile. However, it is a simple shader ideal for using the chocapic13 inspiration. You will get a different level of experience while playing the game and increase its elements through the latest features. It brings many new elements and features that will give positive vibes and calm during gaming. If you also want to experience the other level of gaming in Minecraft, then ensure to install and download the Bliss shader.


The installation guide has been relocated to the installation tab located at the top of the page.
We have compiled helpful installation guides to ensure correct installation of this shaderpack in your Minecraft. Follow these guides for a seamless installation experience.
It is strongly advised to create a backup of your Minecraft map before updating the game to new versions to ensure the safety of your progress.
Locate your Minecraft installation folder. The default location for the Minecraft folder varies depending on your operating system:
Once you’ve found the Minecraft folder, make a copy of it and paste it into a different location, such as an external drive or a backup folder on your computer.
The copied Minecraft folder will serve as your backup. If anything goes wrong during the mod installation process or if you want to revert to the original state, you can replace the modified Minecraft folder with the backup.
Optifine and Forge require Java to be installed on your computer in order to work properly with Minecraft.
Visit the official Java website here: On the website, click on the “Download Java” button.
Once the installer is downloaded, locate the file and double-click on it to run it.

Download the appropriate version for your Minecraft.
Once the Optifine file is downloaded, run the installer and follow the on-screen instructions to install it

Download the Shader package that is compatible with your Minecraft version.
Open the Minecraft launcher and select the newly installed OptiFine profile to launch the game.

Once in the game, navigate to the “Options” menu, then select “Video Settings,” and click on “Shaders.”

In the Shaders menu, you’ll find a “shaderpacks” folder button. Copy the downloaded shader pack’s zip file into this folder.

You should see the installed shader pack listed in the in-game Shaders menu. Select it to enable the shader.


Download the latest version of the Iris installer.
Locate the downloaded Iris Installer and open it.
Choose installation type:

Download the Shader package that is compatible with your Minecraft version.
Launch the Minecraft launcher. Choose the profile you decided to install in the previous step.

Navigate to Options > Video Settings > Shader Packs within the game.

You can directly drag and drop the shaders zip file into the Minecraft window to install a shader pack.

Bliss v2.0.4

OPAL Shaders combines a fantasy feel and contrasting colours without compromising the original game’s aesthetic
BSL Shaders is one of the most popular shaders available for Minecraft
The Complementary Reimagined Shaders can improve the Minecraft Java edition.

Pegasus Shaders stands out as a promising shader pack.
Sildur’s Vibrant Shaders is one of the most renowned Minecraft shader packs.
Complementary Shaders is one of the most popular Minecraft shader packs.