Review
How to install
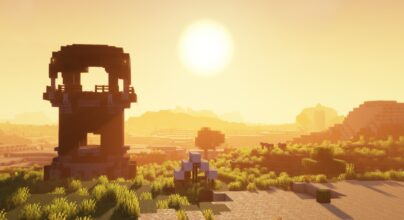
Miniature shader 26.2 → 26.1.2 as made by Ukrech in 2022, and it has become quite popular. With over 700k downloads, it’s one of the best shader packs out there, amongst others. For instance, it is pack is light and can boost the visuals in Minecraft. It also keeps your game running smoothly.
Designed for players without high-end hardware, this shaderpack strikes a balance between looks as well as performance. Don’t forget how it changes the game’s environment. In other words, it makes everything look more vibrant and immersive. Don’t worry because it will not slow down your computer.
Miniature shader is excellent for players who like a more customized look. It doesn’t have the complexity of heavier shaders despite being able to give a fresh view of the Minecraft world. Its improved lighting as well as atmospheric effects, add depth. Plus, even players with low-spec computers can enjoy better graphics. This simply implies that you will have the chance to upgrade the visuals in your world without bothering about your PC features.
As Minecraft keeps changing, shader packs like Miniature Shader help to ensure it looks amazing as well as realistic. This lightweight option works for many players. For instance, it lets more people enjoy Minecraft’s beauty. Whether you’re building, exploring, or playing with friends, this shaderpack makes the game more fun to look at. Each session feels more rewarding. Also, it’s good to know that Miniature Shader works with OptiFine or Iris.
Key Features:
Here are the key features of Miniature Shader. Let’s break them down:
- Lightweight Performance: This shader is made to be lightweight. It ensures smooth gameplay even on lower-end computers.
- Blocky Shadows: The shader pack is characterized by blocky shadows. These keep your world looking unique. They also add depth as well as realism.
- Water Reflections: Water surfaces look better with mirror-like reflections. This makes aquatic areas deeper as well as worth exploring.
- Emissive Lighting: Lighting from torches or glowing blocks is enhanced. It looks more vibrant as well as realistic.
- Customizable Settings: Players can make different adjustments. These are water effects, torch colors, contrast levels, and underwater shades.
- Simple Shadow System: The shadow system is simple. For instance, you can easily turn shadows on or off. Players can also adjust their distance and contrast.
- Compatibility: Miniature Shader works with many Minecraft versions. It supports versions from 1.7.10 as well as the latest release.
- Minimalistic Approach: This shader pack is minimalistic. It focuses on key visual enhancements. Therefore, you won’t be overwhelmed with complex settings.
- Preserving Performance: Miniature shader improves visuals but still preserves performance. This ensures smooth gameplay.
- Maintaining Vanilla Style: The shader pack has been created to enhance Minecraft’s visuals. However, it keeps the game’s unique blocky style intact.
Final Thoughts
Miniature Shader is perfect for casual players or anyone who wants to enjoy Minecraft without the hassle of intense shaders. It makes exploring your world more fun to experience. This is because the improved visuals bring the game world to life. Furthermore, installing the shader is easy, and you’ll notice the difference right away.
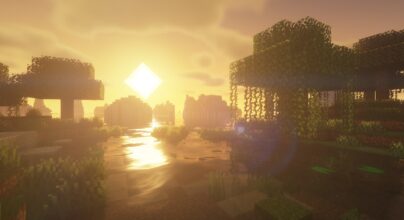
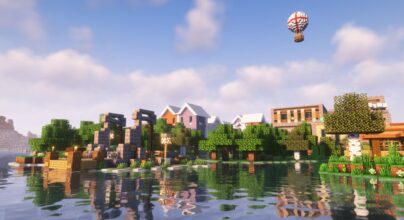
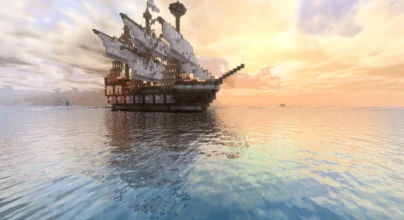
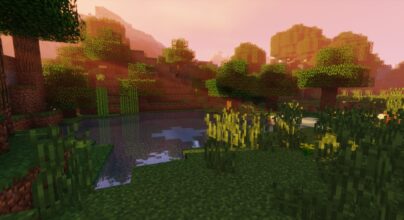
Gallery


How to Install?
The installation guide has been relocated to the installation tab located at the top of the page.
Quick pollHelp Developers
Miniature Shader Links
Please note the following information:
- Some Shaders have not been appropriately updated to 26.1. Still, all have been tested and work correctly in Minecraft 26.1.
- All download links are original and from the creator himself. We never host or edit any files. We only distribute them as a direct link to our users, ensuring security and quality. If you doubt this, don’t forget to read our Terms.
- Additionally, browse the best Minecraft Shaders, grouped by category for easier navigation.
We have compiled helpful installation guides to ensure correct installation of this shaderpack in your Minecraft. Follow these guides for a seamless installation experience.
Backup Guide
It is strongly advised to create a backup of your Minecraft map before updating the game to new versions to ensure the safety of your progress.
Locate the Folder
Locate your Minecraft installation folder. The default location for the Minecraft folder varies depending on your operating system:
- Windows: %appdata%.minecraft
- Mac: ~/Library/Application Support/minecraft
- Linux: ~/.minecraft
Make a Copy
Once you’ve found the Minecraft folder, make a copy of it and paste it into a different location, such as an external drive or a backup folder on your computer.
Save and Restore if Necessary
The copied Minecraft folder will serve as your backup. If anything goes wrong during the mod installation process or if you want to revert to the original state, you can replace the modified Minecraft folder with the backup.
Java Installation Guide
Optifine and Forge require Java to be installed on your computer in order to work properly with Minecraft.
Download the Java installer
Visit the official Java website here: On the website, click on the “Download Java” button.
Run the installer
Once the installer is downloaded, locate the file and double-click on it to run it.

OptiFine Loader
Required 1.8.8+Step by Step
Download Optifine:
Download the appropriate version for your Minecraft.
Install Optifine
Once the Optifine file is downloaded, run the installer and follow the on-screen instructions to install it

Download Shaders:
Download the Shader package that is compatible with your Minecraft version.
Launch Minecraft with OptiFine
Open the Minecraft launcher and select the newly installed OptiFine profile to launch the game.

Locate the Shaders option
Once in the game, navigate to the “Options” menu, then select “Video Settings,” and click on “Shaders.”

Install Shaders
In the Shaders menu, you’ll find a “shaderpacks” folder button. Copy the downloaded shader pack’s zip file into this folder.

Enable the shader in Minecraft
You should see the installed shader pack listed in the in-game Shaders menu. Select it to enable the shader.


Iris Loader
Required 1.16.2+Step by Step
Download Iris:
Download the latest version of the Iris installer.
Install Iris
Locate the downloaded Iris Installer and open it.
Choose installation type:
- Iris Install: Select this option if you don’t plan on using any other mods alongside Iris.
- Fabric Install: Opt for this option if you intend to use Iris with Fabric and other mods. The Iris jar files will be copied to the mods folder within the .minecraft directory.

Download Shader:
Download the Shader package that is compatible with your Minecraft version.
Launch Minecraft
Launch the Minecraft launcher. Choose the profile you decided to install in the previous step.

Install Shaders
Navigate to Options > Video Settings > Shader Packs within the game.

Drag and Drop
You can directly drag and drop the shaders zip file into the Minecraft window to install a shader pack.

You Might Also Like

New
OPAL Shaders combines a fantasy feel and contrasting colours without compromising the original game’s aesthetic
Best
BSL Shaders is one of the most popular shaders available for Minecraft
Up!
The Complementary Reimagined Shaders can improve the Minecraft Java edition.
Best
Sildur’s Vibrant Shaders is one of the most renowned Minecraft shader packs.
Best
Complementary Shaders is one of the most popular Minecraft shader packs.