

Complementary Shaders 1.21 → 1.20.4
Complementary Shaders 1.21 → 1.20.4 is probably one of the must-have Minecraft Shaders in the game Minecraft. This game is not all about embarking on adventures and conquering your world. Of course, it is easy to talk about having the best weapons, ammo, and tools to overcome obstacles in your world. Beyond all of these, there is the need to have a reliable and proven Shader to address graphics problems. The good part about all these is that you don’t need to start looking for a reliable shader, as one of the best is now within your reach. This is in the form of Complementary Shaders.
The principal aim of this write-up is to explain what Complementary Shaders Unbound are all about. However, there is no doubt that after checking out the details below, you will be thrilled by what this tool has been created to do in the worlds of Minecraft players. Do you want to improve the graphics and visuals of your world? Are you aware that many Shader packs have fallen below expectations? Complementary Shader are quite different; you will soon find out how in the subheadings below. This is one of those Java edition shader packs. Complementary Shaders 1.20 was created in 2020 by EminGTR. It is one tool that promises to offer Minecraft players a lot once downloaded and installed. As proof of its popularity, this tool has been downloaded over 4.900,000 times by players. If you have used BSL shaders in the past but want something better, this shader pack will address your needs. This is because BSL shaders are what it has been based on.
Only some shader packs can be considered perfect at everything Minecraft is known for. These could be compatibility, beauty, gameplay, performance, etc. It gives players like you so much yet takes away nothing in return. Do you have a low-specification system but still want to enjoy the best of optimum visuals in your world? Are you aware that few shader packs can be used in such systems? The good part is that Complementary Shader 1.19 can make you enjoy the best visuals and graphics without taking too much GPU. It is one of the easiest ways to bring your imagination into reality with breathtaking graphics. After downloading and installing Minecraft Complementary Shaders, you will have the rare chance to explore a world that has been transformed in terms of graphics. The effects that it adds are pretty balanced. Therefore, don’t expect any unnecessary addition. Another great advantage of using Complementary Shaders is that they can help you fix some issues that most shaders have always ignored. If you want to have a world that will become the envy of others, this is one of the most reliable options to explore. It is capable of bringing your imagination into reality.
Features


| Profiles | Low | Medium | High | Ultra |
|---|---|---|---|---|
| N/A |
v4.7.2 by EminGTR
- Added support for Minecraft 1.20 additions
- Fixed disabling Parallax Occlusion Mapping breaking the visuals
v4.7.1 by EminGTR
- Fixed crash on Optifine 1.19.3
v4.7 by EminGTR
- Improved Parallax Occlusion Mapping with Slope Normals. All thanks to null511
- Improved foliage and leaf shading when shadows are disabled
- Added an option to disable cloud and aurora reflections on water. Disabled on Potato Profile
- Tweaked water color and reflection intensity when sky or terrain reflections are disabled
- Tweaked non-real-time shadows to appear smoother
- Tweaked TAA to prevent some smudges and slightly reduce flickering
- Tweaked Froglight colors (IntegratedPBR)
- Fixed visual artifacts on AMD’s RX 7000 series GPUs
- Fixed Parallax Occlusion Mapping being broken with high resolution PBR resource packs on Iris
- Fixed some particles no longer being visible behind translucents on newer Iris versions
- Fixed enabling Snow Mode causing the visuals to break in some situations
- Fixed Rain Puddles making foliage look incorrect when Real-Time Shadows are disabled
- Fixed sun/moon light and reflections appearing on incorrect texels with some normal maps
- Fixed Rain Puddles appearing on top of Cauldron Water when Rain Puddle Biome Check is disabled
- “Potato” Profile now uses the RTX-ish Water Type to look better with no waves
- Disabled Lens Flare when the camera is underwater
- Force-disabled Scene Aware Colored Lighting on Mc versions below 1.16.5 to prevent broken lighting
- Updated license
Complementary – Compatible with Minecraft 1.20.6

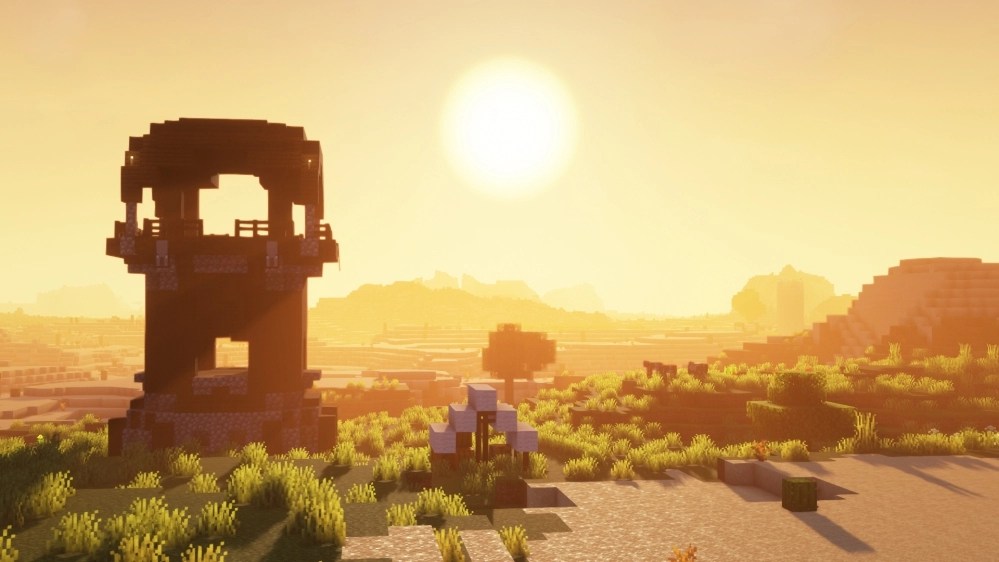
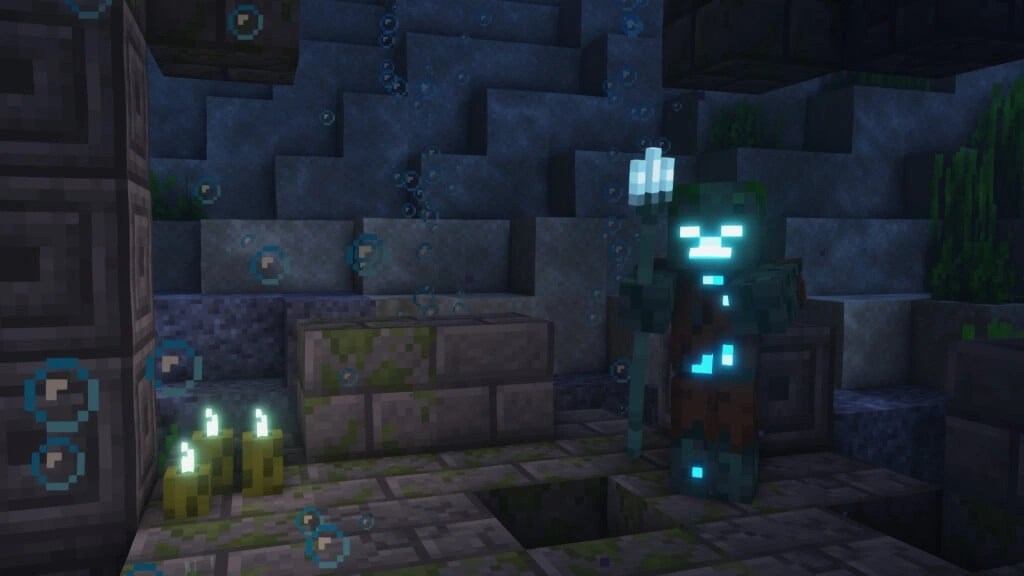
Comparison


How to Install Complementary Shaders?
We have compiled helpful installation guides to ensure correct installation of this shaderpack in your Minecraft. Follow these guides for a seamless installation experience.
It is strongly advised to create a backup of your Minecraft map before updating the game to new versions to ensure the safety of your progress.
Locate the Folder
Locate your Minecraft installation folder. The default location for the Minecraft folder varies depending on your operating system:
- Windows: %appdata%.minecraft
- Mac: ~/Library/Application Support/minecraft
- Linux: ~/.minecraft
Make a Copy
Once you’ve found the Minecraft folder, make a copy of it and paste it into a different location, such as an external drive or a backup folder on your computer.
Save and Restore if Necessary
The copied Minecraft folder will serve as your backup. If anything goes wrong during the mod installation process or if you want to revert to the original state, you can replace the modified Minecraft folder with the backup.
Optifine and Forge require Java to be installed on your computer in order to work properly with Minecraft.
Download the Java installer
Visit the official Java website here: On the website, click on the “Download Java” button.
Run the installer
Once the installer is downloaded, locate the file and double-click on it to run it.

- Support Forge / Vanilla
- Shaders Compatibility
- Extra Features
- FPS Boost
- Optimized Textures
 Optifine Installation Guide
 How to install Complementary Shaders with Optifine?
Download Optifine:
Download the appropriate version for your Minecraft.
Install Optifine:
Once the Optifine file is downloaded, run the installer and follow the on-screen instructions to install it

Download Shaders:
Download the shader pack that is compatible with your Minecraft version.
Launch Minecraft with OptiFine
Open the Minecraft launcher and select the newly installed OptiFine profile to launch the game.

Locate the Shaders option
Once in the game, navigate to the “Options” menu, then select “Video Settings,” and click on “Shaders.”

Install Shaders
In the Shaders menu, you’ll find a “shaderpacks” folder button. Copy the downloaded shader pack’s zip file into this folder.

Enable the shader in Minecraft
You should see the installed shader pack listed in the in-game Shaders menu. Select it to enable the shader.


- Support Fabric / Quilt
- Performance Boost
- Shaders Compatibility
 Iris Installation Guide
 How to install Complementary Shaders with Iris & Sodium?
Download Iris:
Download the latest version of the Iris installer.
Install Iris
Locate the downloaded Iris Installer and open it.
Choose installation type:
- Iris Install: Select this option if you don’t plan on using any other mods alongside Iris.
- Fabric Install: Opt for this option if you intend to use Iris with Fabric and other mods. The Iris jar files will be copied to the mods folder within the .minecraft directory.

Launch Minecraft
Launch the Minecraft launcher. Choose the profile you decided to install in the previous step.

Install Shaders
Navigate to Options > Video Settings > Shader Packs within the game.
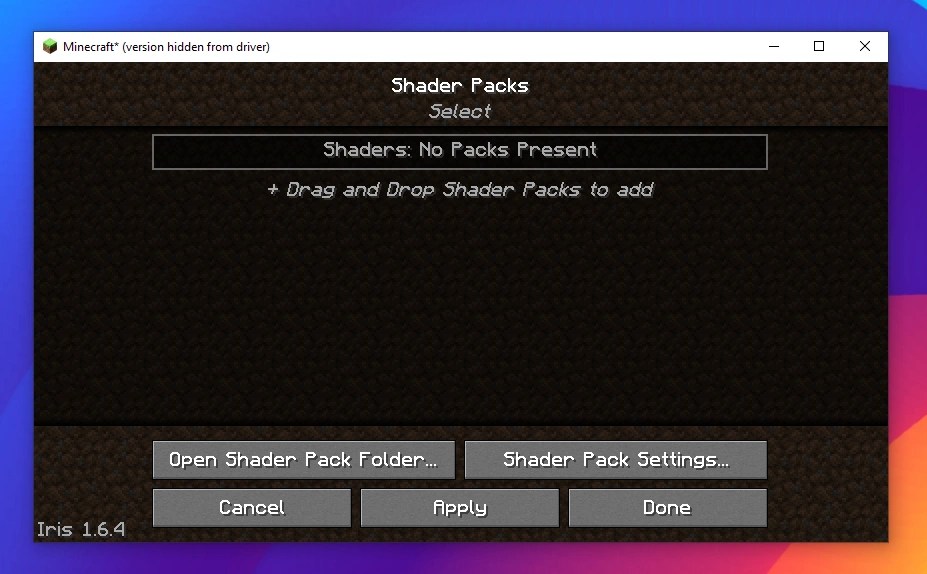
Drag and Drop
You can directly drag and drop the shader zip file into the Minecraft window to install a shader pack.

Complementary Shaders — Download Links
 Files
Files- Some Shaders have not been appropriately updated to 1.20.4. Still, all have been tested and work correctly in Minecraft 1.20.4.
- All download links are original and from the creator himself. We never host or edit any files. We only distribute them as a direct link to our users, ensuring security and quality. If you doubt this, don’t forget to read our Terms.
- It is noteworthy that the links may stop working with each new update. Even with all our efforts to keep everything updated, these things can happen; if any link is not working, please let us know.
- Leave feedback below on what you think of this Shader Pack; it helps the authors improve their packs.


