

Solas Shaders 1.21 → 1.20.6
When it comes to the new shader packs, the Solas Shaders 1.21 → 1.20.6 is among them. And it is a good shader. We enjoyed trying this shader out and playing with it. It is necessary for users who want to produce Minecraft gameplay content and play the game. Without shaders, a game appears dull and lifeless. We can all agree that shaders use many system resources, and not all players have powerful PCs that can handle huge files. Although there are shaders made for low-end PCs, most of them lack some desirable features. Texture packs give the game a nicer, more modern look, but even with a fantastic texture pack, the atmosphere still feels fully realized with shaders. If you want to produce visually stunning material, shaders are crucial. Even the simplest texture packs appear more beautiful and pleasant thanks to shaders. When playing a realistic texture pack on a powerful PC, heavy shaders make the experience even more wonderful.
An extraordinary gaming experience is made possible by the details it offers, the overall aesthetics, and the overall realism. And, of course, you can get shaders only thanks to Optifine or Iris Shaders. And it is best to use Optifine. This modification tool will give you so many things to do. Yes, the main goal for this is to install the Minecraft Shaders. But it will also give you more FPS and a much smoother experience in the game. This comes in handy when you have a low-end PC. Yes, it works well for medium-end PC too. In general, there are many benefits, and nothing is against it. One of those shaders that gives up a little performance for monstrous beauty is Solas Shader. It transports you to a game that boasts of fusing fantasy and realism. Most other shaders with 3D volumetric clouds leak in enclosed locations such as caverns or mountains. The Solas Shader addresses this problem by detecting enclosed spaces and searching for cloud shadows, transforming volumetric clouds into volumetric light. Your game’s looks will be unique thanks to this feature.
Realistic bodies of water and fog are another excellent aspect of this shader. If you can run this fantastic shader, visit a nearby body of water; you’ll be glad you did. You have the impression that you are inside a well-made 3D fantasy video game near to reality because of how the water reflects items and the current moves. You can only imagine how much better it would seem if you walked up close to it in VR! This game’s fog is done gently enough not to block any amazing views you may have in front of you. It is not overly dramatic like some shaders may be. Be ready to witness low-lying clouds at night if you’re in a high location. The vista is so breathtaking that you might want to build a building. Your skies will never be dull thanks to the shader’s whimsical sky effects like the aurora borealis, Milky Way, End nebula, and End vortex.
If you can’t get enough of this fantastic shader pack, check out Septonius’s other shader creation, Prismarine shaders! Be ready for how this shader collection will make you feel if you’ve experienced several shaders that gave you a wonderful dream sensation. It includes every feature a fan of fantasy-themed shaders could ask for. With a special feature called Bloom Colored Lighting, which causes bloom to adapt to a certain color, the Solas Shaders will improve the visual appeal of your game. In addition, you can anticipate cinematic post-effects like chromatic aberration, temporal and rapid anti-aliasing, a movable and adaptable tone map, and an integrated texture pack with unique emissive and reflective blocks. We are slowly ending this tutorial, and we have answered all of your questions. There is a download link below. You can use it to get this amazing shader.
Features


| Profiles | Low | Medium | High | Ultra |
|---|---|---|---|---|
| N/A |
V1.5b by Septonious
- Fixes and improvements
V1.5 by Septonious
- Improved Aurora Borealis
- Added SSGI
- Tonemap tweaks
- Fixed DOF causing flickering
V1.4 by Septonious
- Improved atmosphere and exponential fog
- Improved volumetric lighting and volumetric clouds
- Optimised shadows
- Optimised volumetric clouds
- Improved water normals, fog and absorption
- Added water light refraction
- Added generated normals
- Modified BCL
- Modified tonemap and other settings
- Fixed some incorrect calculations in water normals and reflections code
- Fixed scene becoming black outside of the shadow render distance
- Fixed major performance issues caused by incorrect shadow calculations
- Custom AO (temporarely)
- Bloom Based Global Illumination (temporarely)
How to Install Solas Shaders?
We have compiled helpful installation guides to ensure correct installation of this shaderpack in your Minecraft. Follow these guides for a seamless installation experience.
It is strongly advised to create a backup of your Minecraft map before updating the game to new versions to ensure the safety of your progress.
Locate the Folder
Locate your Minecraft installation folder. The default location for the Minecraft folder varies depending on your operating system:
- Windows: %appdata%.minecraft
- Mac: ~/Library/Application Support/minecraft
- Linux: ~/.minecraft
Make a Copy
Once you’ve found the Minecraft folder, make a copy of it and paste it into a different location, such as an external drive or a backup folder on your computer.
Save and Restore if Necessary
The copied Minecraft folder will serve as your backup. If anything goes wrong during the mod installation process or if you want to revert to the original state, you can replace the modified Minecraft folder with the backup.
Optifine and Forge require Java to be installed on your computer in order to work properly with Minecraft.
Download the Java installer
Visit the official Java website here: On the website, click on the “Download Java” button.
Run the installer
Once the installer is downloaded, locate the file and double-click on it to run it.

- Support Forge / Vanilla
- Shaders Compatibility
- Extra Features
- FPS Boost
- Optimized Textures
 Optifine Installation Guide
 How to install Solas Shaders with Optifine?
Download Optifine:
Download the appropriate version for your Minecraft.
Install Optifine:
Once the Optifine file is downloaded, run the installer and follow the on-screen instructions to install it

Download Shaders:
Download the shader pack that is compatible with your Minecraft version.
Launch Minecraft with OptiFine
Open the Minecraft launcher and select the newly installed OptiFine profile to launch the game.

Locate the Shaders option
Once in the game, navigate to the “Options” menu, then select “Video Settings,” and click on “Shaders.”

Install Shaders
In the Shaders menu, you’ll find a “shaderpacks” folder button. Copy the downloaded shader pack’s zip file into this folder.

Enable the shader in Minecraft
You should see the installed shader pack listed in the in-game Shaders menu. Select it to enable the shader.


- Support Fabric / Quilt
- Performance Boost
- Shaders Compatibility
 Iris Installation Guide
 How to install Solas Shaders with Iris & Sodium?
Download Iris:
Download the latest version of the Iris installer.
Install Iris
Locate the downloaded Iris Installer and open it.
Choose installation type:
- Iris Install: Select this option if you don’t plan on using any other mods alongside Iris.
- Fabric Install: Opt for this option if you intend to use Iris with Fabric and other mods. The Iris jar files will be copied to the mods folder within the .minecraft directory.

Launch Minecraft
Launch the Minecraft launcher. Choose the profile you decided to install in the previous step.

Install Shaders
Navigate to Options > Video Settings > Shader Packs within the game.
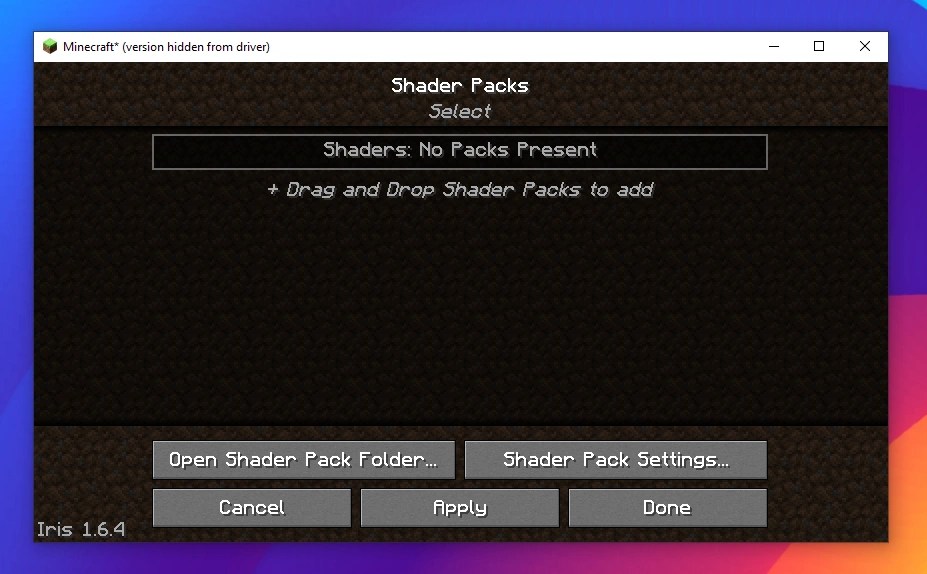
Drag and Drop
You can directly drag and drop the shader zip file into the Minecraft window to install a shader pack.

Solas Shaders — Download Links
 Files
Files- Some Shaders have not been appropriately updated to 1.20. Still, all have been tested and work correctly in Minecraft 1.20.
- All download links are original and from the creator himself. We never host or edit any files. We only distribute them as a direct link to our users, ensuring security and quality. If you doubt this, don’t forget to read our Terms.
- It is noteworthy that the links may stop working with each new update. Even with all our efforts to keep everything updated, these things can happen; if any link is not working, please let us know.
- Leave feedback below on what you think of this Shader Pack; it helps the authors improve their packs.
Download Links:


