Review
How to install
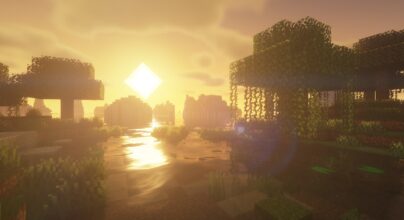
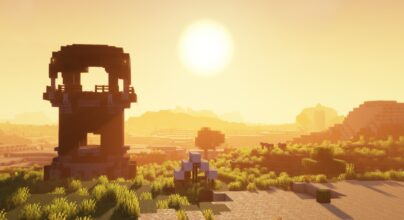
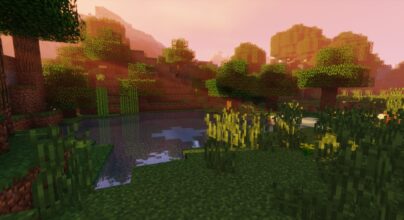
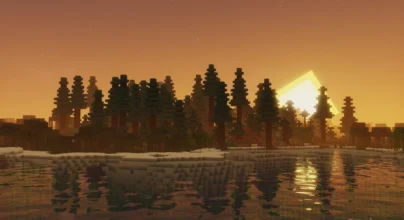
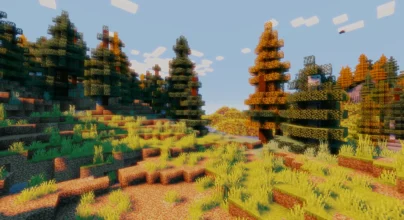
Rethinking Voxels Shaders 1.21.1 → 1.20 is a famous shader in the game. This shader’s popularity is due to its capacity to depict three-dimensional objects and settings. In addition, many shaders are available in the gaming world that help the user to perform better in the games. These shaders will help you change our graphics and make the user’s gameplay more effective and expressive. Minecraft Rethinking Voxels, which include transforming intricate geometry into volumetric representations of tiny cubes known as voxels, are at the heart of Rethinking Voxels Shaders. This voxelization method enhances realism by collecting minute features and characteristics of objects and surroundings, such as material properties, lighting interactions, and dynamic deformations. Rethinking Voxels Shaders provide a more accurate depiction of complicated forms and surfaces in contrast to traditional polygon-based rendering, frequently necessitating simplification and approximation of geometry. Rethinking Voxel shaders provide previously impossible levels of detail and authenticity in rendering virtual objects and settings.
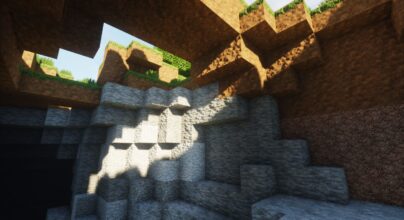
This shader has Many other impressive features that can take your game to another level. You will love your game more when you install these shaders. Rethinking Voxels Shader’s capability to manage global lighting in real time is one of their most impressive capabilities. Global illumination is the term used to describe the accurate representation of indirect lighting, which includes the interaction of light with various surfaces and the subsequent bouncing and diffusing of light rays. Rethinking Voxels Shaders can precisely compute and propagate light in real time by using voxels to represent the scene, producing fantastic lighting effects that closely resemble real-world surroundings. As a result, reflections and refractions behave accurately, shadows grow softer and more realistic, and the overall lighting atmosphere seems more believable. These tiny details of the rethinking voxel shader make your game more interesting for you and your other game fellows.
All the shaders of Minecraft are easy to install and provide many features. All the shaders have different features, graphics, and benefits you will see after installing them. Rethinking Voxels Additionally, dynamic voxel deformation is introduced using shaders, allowing surroundings and objects to react realistically to outside influences. This deformation can have various effects, including the deformation of soft materials like fabric or deformable terrain and the impact of explosions and collisions. These shaders give virtual environments life by replicating voxel-level deformations, making them more responsive and dynamic. Players may see terrain change as they move across it, watch structures collapse under destructive forces, or watch items respond to physical encounters realistically, all in real time.
Rethinking Voxels Shaders provide greater immersion in virtual reality experiences, enabling users to interact with and explore realistic and dynamic virtual landscapes. Architecture and design professionals may assess their projects more realistically by using correct lighting and material representations in architectural visualizations. Rethinking Voxels offer a more accurate representation of real-world interactions in simulations, such as physics-based simulations or training situations. Rethinking Voxel are famous in the gaming industry and very well-known in other industries. Virtual reality, architectural visualization, and many other industries use these shaders. All the shaders have specifications that can help you improve your game. But the voxel shader will help you in exploring your game more realistically. The gamers will love this shader when they explore their game after installing it. The details of the game that the player will be able to see after installing the shader are just unique. Installing the rethinking voxel shader is easy. Apart from all the features, the rethinking voxel shaders are able to depict intricate shapes and surfaces more precisely.
Gallery
How to Install?
The installation guide has been relocated to the installation tab located at the top of the page.
Quick pollHelp Developers
Rethinking Voxels Shaders Links
Please note the following information:
- Some shaders have not been updated for version 1.21.4 of Minecraft. However, all shaders have been tested and are confirmed to work correctly in Minecraft 1.21.4.
- All download links are original and sourced from the creator. We do not host or modify any files. Our role is solely to provide direct links to our users, ensuring security and quality.
- Additionally, you can explore the list of the best Minecraft shaders of all time.
We have compiled helpful installation guides to ensure correct installation of this shaderpack in your Minecraft. Follow these guides for a seamless installation experience.
Backup Guide
It is strongly advised to create a backup of your Minecraft map before updating the game to new versions to ensure the safety of your progress.
Locate the Folder
Locate your Minecraft installation folder. The default location for the Minecraft folder varies depending on your operating system:
- Windows: %appdata%.minecraft
- Mac: ~/Library/Application Support/minecraft
- Linux: ~/.minecraft
Make a Copy
Once you’ve found the Minecraft folder, make a copy of it and paste it into a different location, such as an external drive or a backup folder on your computer.
Save and Restore if Necessary
The copied Minecraft folder will serve as your backup. If anything goes wrong during the mod installation process or if you want to revert to the original state, you can replace the modified Minecraft folder with the backup.
Java Installation Guide
Iris and Forge require Java to be installed on your computer in order to work properly with Minecraft.
Download the Java installer
Visit the official Java website here: On the website, click on the “Download Java” button.
Run the installer
Once the installer is downloaded, locate the file and double-click on it to run it.
Iris Loader
Required 1.16.2+Step by Step
Download Iris:
Download the latest version of the Iris installer.
Install Iris
Locate the downloaded Iris Installer and open it.
Choose installation type:
- Iris Install: Select this option if you don’t plan on using any other mods alongside Iris.
- Fabric Install: Opt for this option if you intend to use Iris with Fabric and other mods. The Iris jar files will be copied to the mods folder within the .minecraft directory.

Download Shader:
Download the Shader package that is compatible with your Minecraft version.
Launch Minecraft
Launch the Minecraft launcher. Choose the profile you decided to install in the previous step.

Install Shaders
Navigate to Options > Video Settings > Shader Packs within the game.

Drag and Drop
You can directly drag and drop the shaders zip file into the Minecraft window to install a shader pack.


