Review
How to install
Euphoria Patches Shader 1.21.7 → 1.21.6 has been a huge success since getting introduced into Minecraft by SpacEagle17 in 2023. Ever seen Minecraft look awesome? That’s Euphoria Shader for you! They turn the game into something almost real and thrilling. It’s like wearing special glasses that transform Minecraft into a dazzling world. These shaders tweak lights, shadows, and how things look, turning the game into a visual treat. Let’s dive in and check out how these shaders spice up the Minecraft universe.
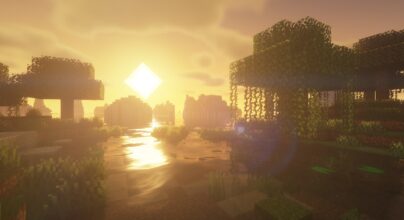
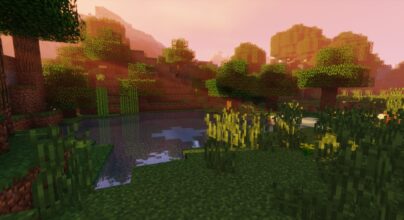
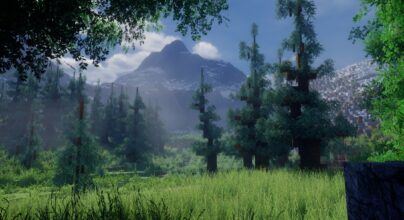
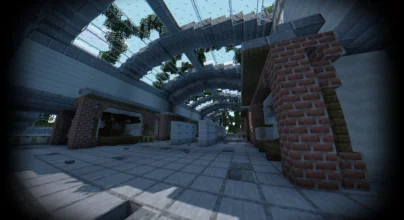
Picture playing Minecraft, but it’s like you’re inside a film. Cool, right? That’s the magic of these shaders. They jazz up everything, making it look lifelike and stunning. The sun’s glow is brighter, the water’s clearer, and trees seem to dance with the breeze. It’s as if Minecraft had a fabulous facelift. We’re on a journey to explore all these awesome changes. Euphoria Patches Shaders are a big step up in making Minecraft look amazing. As computers and game-making tools get better, shader creators keep finding new ways to make Minecraft’s world look more real. Shaders help change the way light looks in the game, making everything feel more lifelike and cooler.
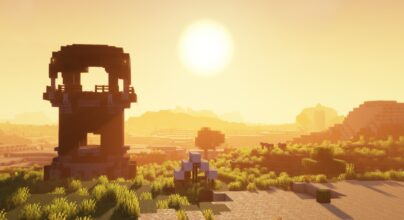
What’s awesome about Euphoria Patches Shaders is how they make you feel like you’re really inside the Minecraft world. They make light look natural, shadows move like they should, and everything more detailed. So, when you’re wandering around, building stuff, or fighting battles, everything looks super real and makes the game even more fun to play.
In conclusion, Euphoria Shaders are a big deal for making Minecraft look way better, giving us some of the coolest visuals we’ve ever seen in the game. As tech gets better and smart folks keep being creative, Minecraft will keep getting even more awesome to look at. If you love building cool stuff or going on epic adventures in Minecraft, these shaders will blow your mind. They turn the simple, blocky world into something really special and beautiful.
You can support SpacEagle17 on https://www.patreon.com/SpacEagle17 and access development versions! SpacEagle17’s Discord Server for contact: https://discord.gg/5N45SAsC3X.
Features
Euphoria Shaders, made to work with Complementary Shaders (Reimagined and Unbound), bring cool features to make Minecraft look awesome. They add special touches to the game’s graphics, making everything you see more exciting and real. Let’s look at some of its unique features.
- Optional Handcrafted Features and Settings: Euphoria Patches add cool new options to Complementary Shaders, letting players tweak how Minecraft looks. You can choose what to turn on or off, making the game look just the way you like it.
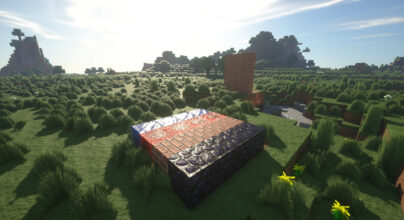
- Enhanced Visual Effects: Euphoria Patches make Minecraft’s world more exciting. They add better lighting, moving shadows, and clearer textures. Everything looks more real, making your time in Minecraft even more fun.
- Compatibility and Installation: You can add Euphoria Patches to your game in different ways, and they work with many versions of Minecraft. Whether you use Fabric or Forge, you can easily get these shaders to spice up your game.
Gallery


How to Install BSL Shaders?
The installation guide has been relocated to the installation tab located at the top of the page.
Quick pollHelp Developers
Euphoria Patches Shader Links
Please note the following information:
- Some shaders have not been updated for version 1.21.6 of Minecraft. However, all shaders have been tested and are confirmed to work correctly in Minecraft 1.21.6.
- All download links are original and sourced from the creator. We do not host or modify any files. Our role is solely to provide direct links to our users, ensuring security and quality.
- Additionally, browse the best shader packs for Minecraft, grouped by category for easier navigation.
We have compiled helpful installation guides to ensure correct installation of this shaderpack in your Minecraft. Follow these guides for a seamless installation experience.
Backup Guide
It is strongly advised to create a backup of your Minecraft map before updating the game to new versions to ensure the safety of your progress.
Locate the Folder
Locate your Minecraft installation folder. The default location for the Minecraft folder varies depending on your operating system:
- Windows: %appdata%.minecraft
- Mac: ~/Library/Application Support/minecraft
- Linux: ~/.minecraft
Make a Copy
Once you’ve found the Minecraft folder, make a copy of it and paste it into a different location, such as an external drive or a backup folder on your computer.
Save and Restore if Necessary
The copied Minecraft folder will serve as your backup. If anything goes wrong during the mod installation process or if you want to revert to the original state, you can replace the modified Minecraft folder with the backup.
Java Installation Guide
Optifine and Forge require Java to be installed on your computer in order to work properly with Minecraft.
Download the Java installer
Visit the official Java website here: On the website, click on the “Download Java” button.
Run the installer
Once the installer is downloaded, locate the file and double-click on it to run it.

OptiFine Loader
Required 1.8.8+Step by Step
Download Optifine:
Download the appropriate version for your Minecraft.
Install Optifine
Once the Optifine file is downloaded, run the installer and follow the on-screen instructions to install it

Download Shaders:
Download the Shader package that is compatible with your Minecraft version.
Launch Minecraft with OptiFine
Open the Minecraft launcher and select the newly installed OptiFine profile to launch the game.

Locate the Shaders option
Once in the game, navigate to the “Options” menu, then select “Video Settings,” and click on “Shaders.”

Install Shaders
In the Shaders menu, you’ll find a “shaderpacks” folder button. Copy the downloaded shader pack’s zip file into this folder.

Enable the shader in Minecraft
You should see the installed shader pack listed in the in-game Shaders menu. Select it to enable the shader.


Iris Loader
Required 1.16.2+Step by Step
Download Iris:
Download the latest version of the Iris installer.
Install Iris
Locate the downloaded Iris Installer and open it.
Choose installation type:
- Iris Install: Select this option if you don’t plan on using any other mods alongside Iris.
- Fabric Install: Opt for this option if you intend to use Iris with Fabric and other mods. The Iris jar files will be copied to the mods folder within the .minecraft directory.

Download Shader:
Download the Shader package that is compatible with your Minecraft version.
Launch Minecraft
Launch the Minecraft launcher. Choose the profile you decided to install in the previous step.

Install Shaders
Navigate to Options > Video Settings > Shader Packs within the game.

Drag and Drop
You can directly drag and drop the shaders zip file into the Minecraft window to install a shader pack.

You Might Also Like
Best
BSL Shaders 1.21.5, 1.21.4 → 1.20.1 remains a popular Minecraft Shader for the beloved game Minecraft.
Best
Sildur’s Vibrant Shaders 1.21.6 → 1.21.5 is one of the most renowned Minecraft shader packs.
Best
Complementary Shaders 1.21.7 → 1.21.6 is one of the most popular Minecraft shader packs.
Outdated
SEUS Shaders, simply the favorite Shader of the Minecraft community.
Best
Bliss Shaders 1.21.6 → 1.21.6 is another excellent Minecraft shader that gives a better appearance in the game and increases performance.
New
The Body Camera shader, offers a unique gaming experience by simulating the effects of a body camera