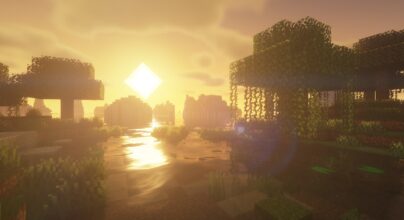
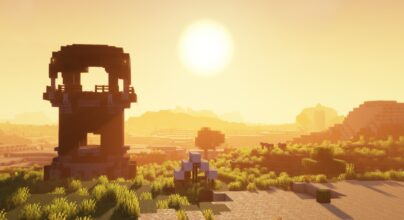
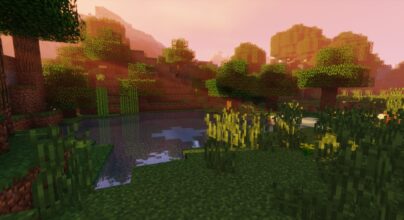
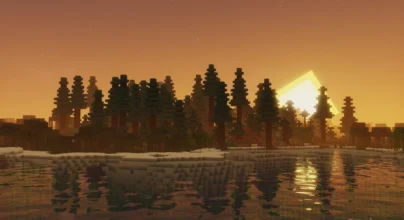
Review
How to install
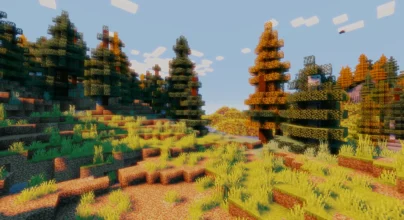
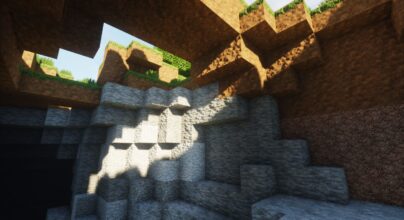
Insanity Shaders 1.21 → 1.20 are all about horror and style! Would you like to try this shader pack and change your Minecraft game? Insanity shaders are the most popular shader packs that you can find. What’s famous about these shaders is the remarkable customization. Insanity shaders help you get a new experience with Minecraft shaders because it is worth the hype. The cinematic preset of insanity shaders would change the overall experience of your game, and the best part is that these shaders are designed to make your game full of horror because these shaders are built in a horror style. Another exciting part about these insanity shaders is that these shaders support torrential rains, which would help you get rid of the sunny mornings. Isn’t that a wonderful surprise? Using insanity shaders is not expensive because it works well on modern low GPUs efficiently. Interestingly it is a perfect choice for all Mac versions and even works well with 1.19 Iris. This insanity shader has been extended from BSL and gives an exquisite installation experience.
Compromising on a shader pack can tend to have an adverse impact on your game. However, using insanity shaders would help you get rid of low resolution and offer an ultimate experience. The effect of this shader pack is quite visible and turns low resolution into a great one! Also, a higher-quality shader pack tends to give excellent quality, making each object visible and easy to spot. You can notice a significant difference in getting the insanity shaders. We all know that BSL shaders deliver excellent quality, and insanity shaders also give a wonderful experience because it is an extended version of it!
Minecraft tends to run on a dull graphics experience. However, adding shader packs to your gaming experience can help you achieve your goals in no time. If you are looking for exceptionally insane graphics, this shader pack will forever change your experience! Insanity shader pack allows you to have the most insane graphics so that everything turns crystal clear and fun! Furthermore, identifying every object has become intensely easy with this shader pack.
Now, you can turn your nightmare into a game by using this shader pack. We believe that horror and adventure can be combined using this shader pack, and we think you would not regret downloading this shader pack because it is versatile and will elevate your game to another level. So, what are you waiting for, gamers? Become a part of insanity shaders, boost your game in a horrific style, and revolutionize your Minecraft game forever! This shader pack is a true reflection of class, horror, sharpness, and ultimate graphics that you would not want to miss! Try it out today!
Want to transform your Minecraft visuals? Don’t miss out on Complementary Shaders, Sildur’s Vibrant Shaders, and Sonic Ether’s Unbelievable Shaders—perfect for any style of gameplay!
Gallery
How to Install?
The installation guide has been relocated to the installation tab located at the top of the page.
Quick pollHelp Developers
Insanity Shader Links
Please note the following information:
- Some shaders have not been updated for version 1.21.4 of Minecraft. However, all shaders have been tested and are confirmed to work correctly in Minecraft 1.21.4.
- All download links are original and sourced from the creator. We do not host or modify any files. Our role is solely to provide direct links to our users, ensuring security and quality.
- Additionally, you can explore the list of the best Minecraft shaders of all time.
We have compiled helpful installation guides to ensure correct installation of this shaderpack in your Minecraft. Follow these guides for a seamless installation experience.
Backup Guide
It is strongly advised to create a backup of your Minecraft map before updating the game to new versions to ensure the safety of your progress.
Locate the Folder
Locate your Minecraft installation folder. The default location for the Minecraft folder varies depending on your operating system:
- Windows: %appdata%.minecraft
- Mac: ~/Library/Application Support/minecraft
- Linux: ~/.minecraft
Make a Copy
Once you’ve found the Minecraft folder, make a copy of it and paste it into a different location, such as an external drive or a backup folder on your computer.
Save and Restore if Necessary
The copied Minecraft folder will serve as your backup. If anything goes wrong during the mod installation process or if you want to revert to the original state, you can replace the modified Minecraft folder with the backup.
Java Installation Guide
Optifine and Forge require Java to be installed on your computer in order to work properly with Minecraft.
Download the Java installer
Visit the official Java website here: On the website, click on the “Download Java” button.
Run the installer
Once the installer is downloaded, locate the file and double-click on it to run it.

OptiFine Loader
Required 1.8.8+Step by Step
Download Optifine:
Download the appropriate version for your Minecraft.
Install Optifine
Once the Optifine file is downloaded, run the installer and follow the on-screen instructions to install it

Download Shaders:
Download the Shader package that is compatible with your Minecraft version.
Launch Minecraft with OptiFine
Open the Minecraft launcher and select the newly installed OptiFine profile to launch the game.

Locate the Shaders option
Once in the game, navigate to the “Options” menu, then select “Video Settings,” and click on “Shaders.”

Install Shaders
In the Shaders menu, you’ll find a “shaderpacks” folder button. Copy the downloaded shader pack’s zip file into this folder.

Enable the shader in Minecraft
You should see the installed shader pack listed in the in-game Shaders menu. Select it to enable the shader.


Iris Loader
Required 1.16.2+Step by Step
Download Iris:
Download the latest version of the Iris installer.
Install Iris
Locate the downloaded Iris Installer and open it.
Choose installation type:
- Iris Install: Select this option if you don’t plan on using any other mods alongside Iris.
- Fabric Install: Opt for this option if you intend to use Iris with Fabric and other mods. The Iris jar files will be copied to the mods folder within the .minecraft directory.

Download Shader:
Download the Shader package that is compatible with your Minecraft version.
Launch Minecraft
Launch the Minecraft launcher. Choose the profile you decided to install in the previous step.

Install Shaders
Navigate to Options > Video Settings > Shader Packs within the game.

Drag and Drop
You can directly drag and drop the shaders zip file into the Minecraft window to install a shader pack.


