Review
How to install
There is no doubt that the game of Minecraft is yearning for a revolutionary mod like Simplicissimus Shaders 26.2 → 26.1.2. Do you want to know why? It is because its features are upgraded. That is to say; they aren’t quite like what you have been used to in the game before now. It is possible you have used other new shaders in Minecraft and have not been impressed by what they have got to offer. Many players have been disappointed in the past by what some shaders offer. In other words, they fall short of expectations in terms of functionalities and features. There is absolutely no need to be bothered, though, because Simplicissimus Shaders 1.19 promises to take your gaming experience to another level entirely in a way that you will never imagine. If you think you have seen the best of what Minecraft has to offer with other shaders, you are entirely wrong. This is because, with Simplicissimus Shaders, you will be seeing and experiencing the impossible in your world. This post is going to be explaining all the details about Simplicissimus Shaders. Just ensure to read all the details below to understand why it is steps ahead of others you have come across before now.
The truth about Simplicissimus Shaders 1.19 is that there are lots of exciting things about it. Many people believe that Minecraft has reached its peak in terms of creativity. However, this shader pack will prove you wrong with some thrilling features. Its author (RRe36) has done a fine job of keeping the game flying very high. Its name may be difficult to pronounce, but it has brought simplicity into the game regarding visuals and graphics. This is one of the most impressive shader packs you will ever stumble upon as a Minecraft player. It has the potentials to revamp your world without any compromise. You must be wondering why this shader pack is different from others, right? It is pretty simple as what it tends to bring is moderation and decent graphics. HD visuals and graphics are indeed great to experience. They have the power to change how your world is looking into something extraordinary. However, there is always a price to pay for such upgrades. This is the fact that they will demand too much from your PC.
The problem with all of these is that you need to have a PC with high specifications and functionalities. This is the only way to enjoy their features firsthand. There is no need to worry as Simplicissimus Shaders 1.18 brings in all of these without you having to experience freezing issues. In other words, it will not demand too much from your PC, yet you will get access to quality visuals and graphics. This is the reason why it has been called Simplicissimus by its author. Are you wondering how to get a decent shader pack that can upgrade your graphics in Minecraft? Do you have an average PC but still want to enjoy quality graphics? Simplicissimus Shaders is the solution to all of your problems. This shader will ensure you have decent graphics that others will admire in your world. Best of all is that it is not demanding. Imagine the chance of upgrading your graphics without hurting your Minecraft overall performance. It is a phenomenal achievement that players will embrace.
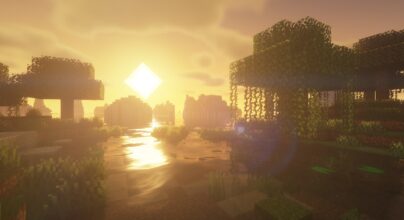
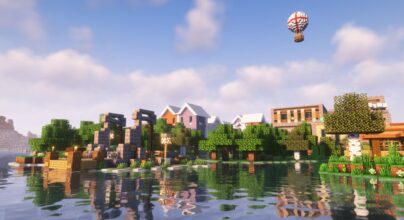
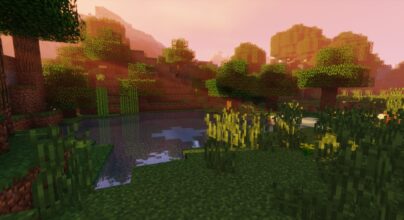
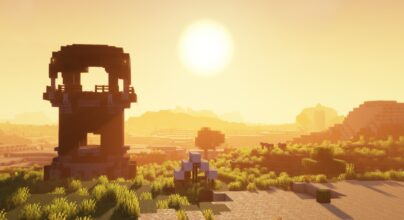
This is a shader pack that brings simple but powerful changes. Your game’s original features will be 100% intact. You will find its changes quite resourceful in lots of regards. Most players don’t like complicated shaders. They can alter your visuals and make the game lose its original touch. Indeed, Minecraft default visuals are not great. However, such doesn’t mean you need something to change them completely. Instead, it would help if you had a tool to improve them. This is what a shader pack like Simplicissimus brings. You will be getting access to soft lighting and a great-looking environment. It brings effects that make the game look the same. That is to say; its effects won’t change the game from what you already know. The bottom line is that this pack will not push your graphics and visuals beyond their normal limits.
Gallery


How to Install?
The installation guide has been relocated to the installation tab located at the top of the page.
Quick pollHelp Developers
Simplicissimus Shader Links
Please note the following information:
- Some Shaders have not been appropriately updated to 26.1. Still, all have been tested and work correctly in Minecraft 26.1.
- All download links are original and from the creator himself. We never host or edit any files. We only distribute them as a direct link to our users, ensuring security and quality. If you doubt this, don’t forget to read our Terms.
- Additionally, browse the best Minecraft Shaders, grouped by category for easier navigation.
We have compiled helpful installation guides to ensure correct installation of this shaderpack in your Minecraft. Follow these guides for a seamless installation experience.
Backup Guide
It is strongly advised to create a backup of your Minecraft map before updating the game to new versions to ensure the safety of your progress.
Locate the Folder
Locate your Minecraft installation folder. The default location for the Minecraft folder varies depending on your operating system:
- Windows: %appdata%.minecraft
- Mac: ~/Library/Application Support/minecraft
- Linux: ~/.minecraft
Make a Copy
Once you’ve found the Minecraft folder, make a copy of it and paste it into a different location, such as an external drive or a backup folder on your computer.
Save and Restore if Necessary
The copied Minecraft folder will serve as your backup. If anything goes wrong during the mod installation process or if you want to revert to the original state, you can replace the modified Minecraft folder with the backup.
Java Installation Guide
Optifine and Forge require Java to be installed on your computer in order to work properly with Minecraft.
Download the Java installer
Visit the official Java website here: On the website, click on the “Download Java” button.
Run the installer
Once the installer is downloaded, locate the file and double-click on it to run it.

OptiFine Loader
Required 1.8.8+Step by Step
Download Optifine:
Download the appropriate version for your Minecraft.
Install Optifine
Once the Optifine file is downloaded, run the installer and follow the on-screen instructions to install it

Download Shaders:
Download the Shader package that is compatible with your Minecraft version.
Launch Minecraft with OptiFine
Open the Minecraft launcher and select the newly installed OptiFine profile to launch the game.

Locate the Shaders option
Once in the game, navigate to the “Options” menu, then select “Video Settings,” and click on “Shaders.”

Install Shaders
In the Shaders menu, you’ll find a “shaderpacks” folder button. Copy the downloaded shader pack’s zip file into this folder.

Enable the shader in Minecraft
You should see the installed shader pack listed in the in-game Shaders menu. Select it to enable the shader.


Iris Loader
Required 1.16.2+Step by Step
Download Iris:
Download the latest version of the Iris installer.
Install Iris
Locate the downloaded Iris Installer and open it.
Choose installation type:
- Iris Install: Select this option if you don’t plan on using any other mods alongside Iris.
- Fabric Install: Opt for this option if you intend to use Iris with Fabric and other mods. The Iris jar files will be copied to the mods folder within the .minecraft directory.

Download Shader:
Download the Shader package that is compatible with your Minecraft version.
Launch Minecraft
Launch the Minecraft launcher. Choose the profile you decided to install in the previous step.

Install Shaders
Navigate to Options > Video Settings > Shader Packs within the game.

Drag and Drop
You can directly drag and drop the shaders zip file into the Minecraft window to install a shader pack.

You Might Also Like

New
OPAL Shaders combines a fantasy feel and contrasting colours without compromising the original game’s aesthetic
Best
BSL Shaders is one of the most popular shaders available for Minecraft
Up!
The Complementary Reimagined Shaders can improve the Minecraft Java edition.

Best
Sildur’s Vibrant Shaders is one of the most renowned Minecraft shader packs.
Best
Complementary Shaders is one of the most popular Minecraft shader packs.