Review
How to install
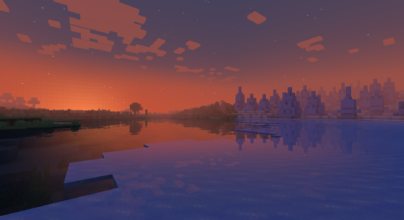
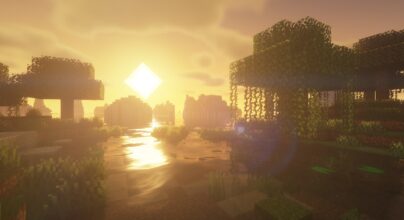
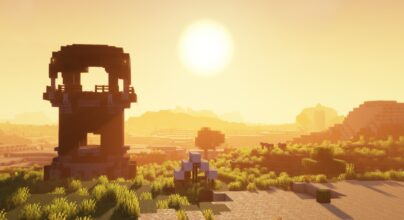
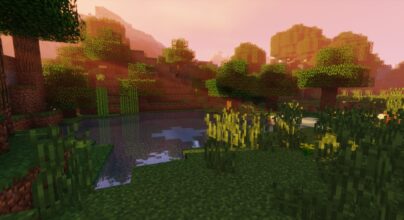
Nostalgia Shaders 1.21.1 → 1.20 is a renovation of old Shaders, the new reality. One thing you have to know about the game of Minecraft is that bringing your world to life is no mean feat. This is because you will have to search everywhere for the best Minecraft Shaders. The truth is that there are very few shaders that can improve the graphics of your world beyond what it is at the moment. The good news is that one of the best shaders has come within your reach today, with robust features and functionalities to redefine your gameplay without any compromise. This is Nostalgia Shaders, and it has existed in the game of Minecraft to achieve one purpose. This is helping to improve the appearance of your world compared to what vanilla Minecraft has got to offer players. So in case you have been combing the net for a reliable shader pack that can meet your needs, this is one of the best around.
This post will be aiming to explain what makes Nostalgia shader one of the best out there. It will be revealing every detail about its history, the purpose of creation, features, compatibility and installation process. Of course, after checking out the details below, you will be considering the possibility of downloading and installing this shader pack for an immersive gaming experience. When Nostalgia shaders first got introduced in 2019 by RRe36, there were lots of players in the Minecraft community who doubted its potentials. For instance, many players never believed that it took to compete amongst some of the heavyweights. This made the shader pack less prevalent in the world of Minecraft. Fast forward to today, and it’s a different story as players can’t seem to have enough of what this shader pack has got to offer. Given the changes that it brings, there is every reason to believe that its author, RRe36, has made many efforts to make it a huge success.
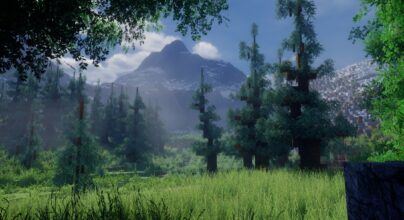
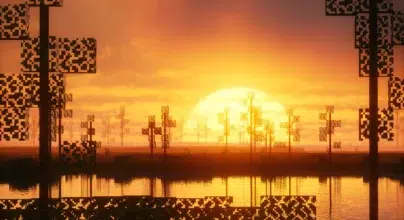
The first set of shader packs that hit the Minecraft Community are Chocapic Shaders and SEUS Shader. While these have been good, there is no doubt that Nostalgia shaders can also stake their claims with some excellent features. For instance, it has been developed to offer what those highly-rated shader packs offer. The visual effects that you will come across while using this shader pack are second to none. They are capable of transforming your world and ensuring it looks livelier than it is looking at the moment. You will discover that your world has got volumetric fog. Also, the skies are going to be looking more natural. They will no longer become static as before. In the game Minecraft, shadows are not present. This makes your adventure to be less exciting. However, the Nostalgia shader pack will change all of these with some premium features. Have you been looking for how to improve the appearance of your world? Do you want the landscapes, sun, shadows, trees, water, cloud in your world to become very real and apparent? There is no better way to achieve such a feat than having Nostalgia shader pack downloaded and installed. This is one shader that will change your world for good. Such is the reason why it has been able to get over 244,237 downloads.
You will be thrilled by what Nostalgia shader pack has got to offer players in their worlds after installation. It is basically about reviving the appearance of your world and making it look authentic.
Please note that this shader pack doesn’t support Intel HD 5000 Graphics (and older versions). Also, Optifine 1.12+ is required. If you can get something newer, such will be supported. It can be downloaded and installed on Linux and Windows. AMD or NVidia graphic card, which supports OpenGL 4.0, is required. You will be fine by ensuring the above requirements are met.
Gallery
How to Install?
The installation guide has been relocated to the installation tab located at the top of the page.
Quick pollHelp Developers
Nostalgia Shader Links
Please note the following information:
- Some shaders have not been updated for version 1.21 of Minecraft. However, all shaders have been tested and are confirmed to work correctly in Minecraft 1.21.
- All download links are original and sourced from the creator. We do not host or modify any files. Our role is solely to provide direct links to our users, ensuring security and quality.
- Additionally, you can explore the list of the best Minecraft shaders of all time.
We have compiled helpful installation guides to ensure correct installation of this shaderpack in your Minecraft. Follow these guides for a seamless installation experience.
Backup Guide
It is strongly advised to create a backup of your Minecraft map before updating the game to new versions to ensure the safety of your progress.
Locate the Folder
Locate your Minecraft installation folder. The default location for the Minecraft folder varies depending on your operating system:
- Windows: %appdata%.minecraft
- Mac: ~/Library/Application Support/minecraft
- Linux: ~/.minecraft
Make a Copy
Once you’ve found the Minecraft folder, make a copy of it and paste it into a different location, such as an external drive or a backup folder on your computer.
Save and Restore if Necessary
The copied Minecraft folder will serve as your backup. If anything goes wrong during the mod installation process or if you want to revert to the original state, you can replace the modified Minecraft folder with the backup.
Java Installation Guide
Optifine and Forge require Java to be installed on your computer in order to work properly with Minecraft.
Download the Java installer
Visit the official Java website here: On the website, click on the “Download Java” button.
Run the installer
Once the installer is downloaded, locate the file and double-click on it to run it.

OptiFine Loader
Required 1.8.8+Step by Step
Download Optifine:
Download the appropriate version for your Minecraft.
Install Optifine
Once the Optifine file is downloaded, run the installer and follow the on-screen instructions to install it

Download Shaders:
Download the Shader package that is compatible with your Minecraft version.
Launch Minecraft with OptiFine
Open the Minecraft launcher and select the newly installed OptiFine profile to launch the game.

Locate the Shaders option
Once in the game, navigate to the “Options” menu, then select “Video Settings,” and click on “Shaders.”

Install Shaders
In the Shaders menu, you’ll find a “shaderpacks” folder button. Copy the downloaded shader pack’s zip file into this folder.

Enable the shader in Minecraft
You should see the installed shader pack listed in the in-game Shaders menu. Select it to enable the shader.

Iris Loader
Required 1.16.2+Step by Step
Download Iris:
Download the latest version of the Iris installer.
Install Iris
Locate the downloaded Iris Installer and open it.
Choose installation type:
- Iris Install: Select this option if you don’t plan on using any other mods alongside Iris.
- Fabric Install: Opt for this option if you intend to use Iris with Fabric and other mods. The Iris jar files will be copied to the mods folder within the .minecraft directory.

Download Shader:
Download the Shader package that is compatible with your Minecraft version.
Launch Minecraft
Launch the Minecraft launcher. Choose the profile you decided to install in the previous step.

Install Shaders
Navigate to Options > Video Settings > Shader Packs within the game.

Drag and Drop
You can directly drag and drop the shaders zip file into the Minecraft window to install a shader pack.


